
Mobo Generator - Генератор иконок мобильных операторов
Mobo Generator - это удобный сервис для веб-разработчиков, который позволяет сгенерировать CSS и HTML код иконок мобильных операторов. Сервис развивается и сейчас уже имеет базу операторов таких стран как Украина, Россия, Белоруссия, Казахстан и Молдова.
C нашим сервисом верстка контактных телефонов займет у вас времени меньше, чем Google тратит на загрузку своей главной страницы
Ornament UA - Онлайн конструктор уникального украинского орнамента
Это самый удобный ресурс для создания уникального национального украинского орнамента по правилам Бродовского письма ПодробнееСвежие материалы
Последние добавленные jQuery скрипты

Описание Плагин itour дает возможность рассказать вам о функциональности любого интерфейса. Кроме того, плагин itour мо...

Описание Плагин liMarqueeWP позволяет отображать различное HTML содержимое, изображения и просто текст на вашей страниц...

The Perfect Choice For Customizing Maps ...
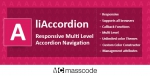
The liAccordion is a unique plugin for implementation "accordion" navigation of any type of content. Size of the plug...

Авторские jQuery плагины
jQuery Плагин liFirstLetter оборачивает первую букву выбранного элемента тегом. Вы ...
Плагин liMenuVert создает вертикальное многоуровневое меню с неограниченной вложеннос...
jQuery userscript «Rouletbet» предназначен для игры «Герои войны и денег», она же - H...
jQuery Плагин liMenuHor создает горизонтальное многоуровневое меню с неограниченной в...
Userscript jquery особого назначения
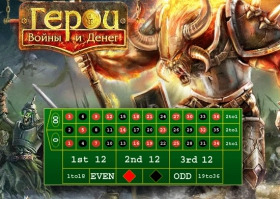
jQuery userscript «Rouletbet» предназначен для игры «Герои войны и денег», она же - HeroesWM.ru, или просто HWM. Rouletbet показывает вам ставки пяти последних игр в рулетку любого из персонажей иг...
Последние коментарии
-
liMarquee - Responsive Marquee for Text, HTML and Images или бегущая строка на jQuery для текста, кода или изображений
1 год назадHi Jura! I like using your script,but I want combined with form for the speed. Az ?rab?red bevit ... -
liTabs - jQuery Tabs или вкладки на jQuery
1 год назадХорошая вешь
Чем вы можете помочь?
Если вы ведете блог или у вас есть сайт - поставьте ссылку на www.masscode.ru. Скопируйте этот код:
2. Поддержать проект финансово
Вы можете сделать добровольное пожертвование
 |
AUH: U878157792792, USD: Z821422743261, RUB: R360648948582, EUR: E298388086680 |